Example of an asynchronous type of workflow
Hello all, as I have told in my last blog about how many types of workflows we can create in Microsoft CRM. In this blog, I am going to show you an example of an Asynchronous kind of workflow.
In this example, we will create a simple workflow that runs in the background(asynchronously) to assign any newly created Contact record to a specific user and then send out a welcome email to the client.
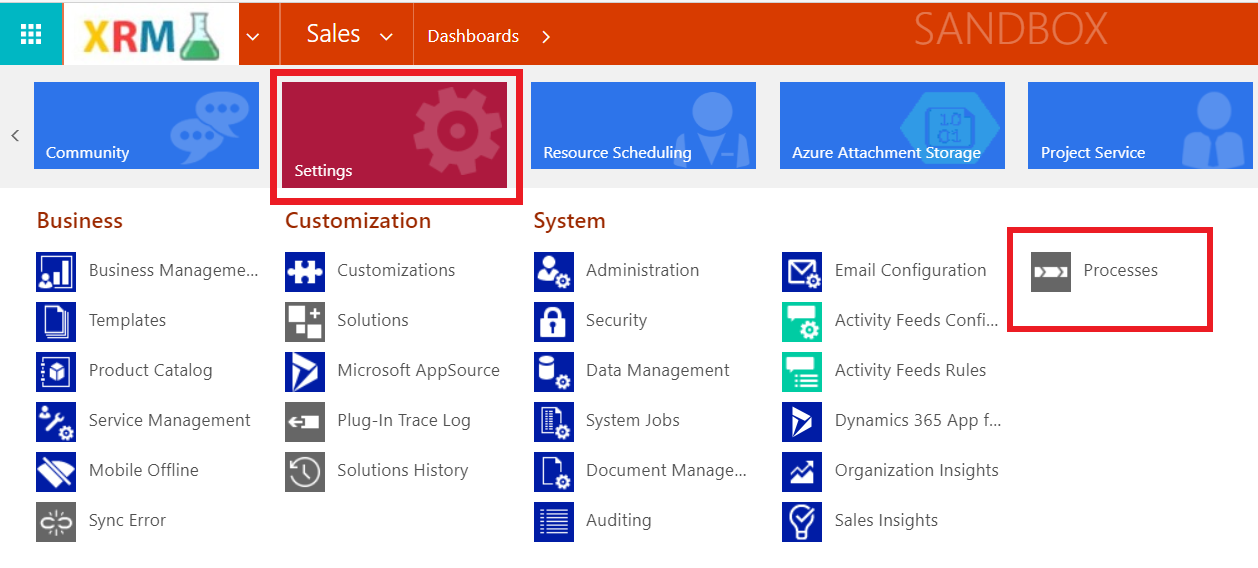
Step 1 − Go to Settings → Click Processes.
Step 2 − Click New.
Step 3 − A blank Process window opens, enter the following details −
Process Name − New client workflow (This is any name that connected your method)
Category − Workflow
Entity − Contact (This is the entity on you're making the workflow. In our case, it's Contact) Run this workflow in the background (recommended) − Check this selection as we tend to area unit making an asynchronous background workflow. Finally, click, OK.
.png?ver=2020-08-06-005052-237)
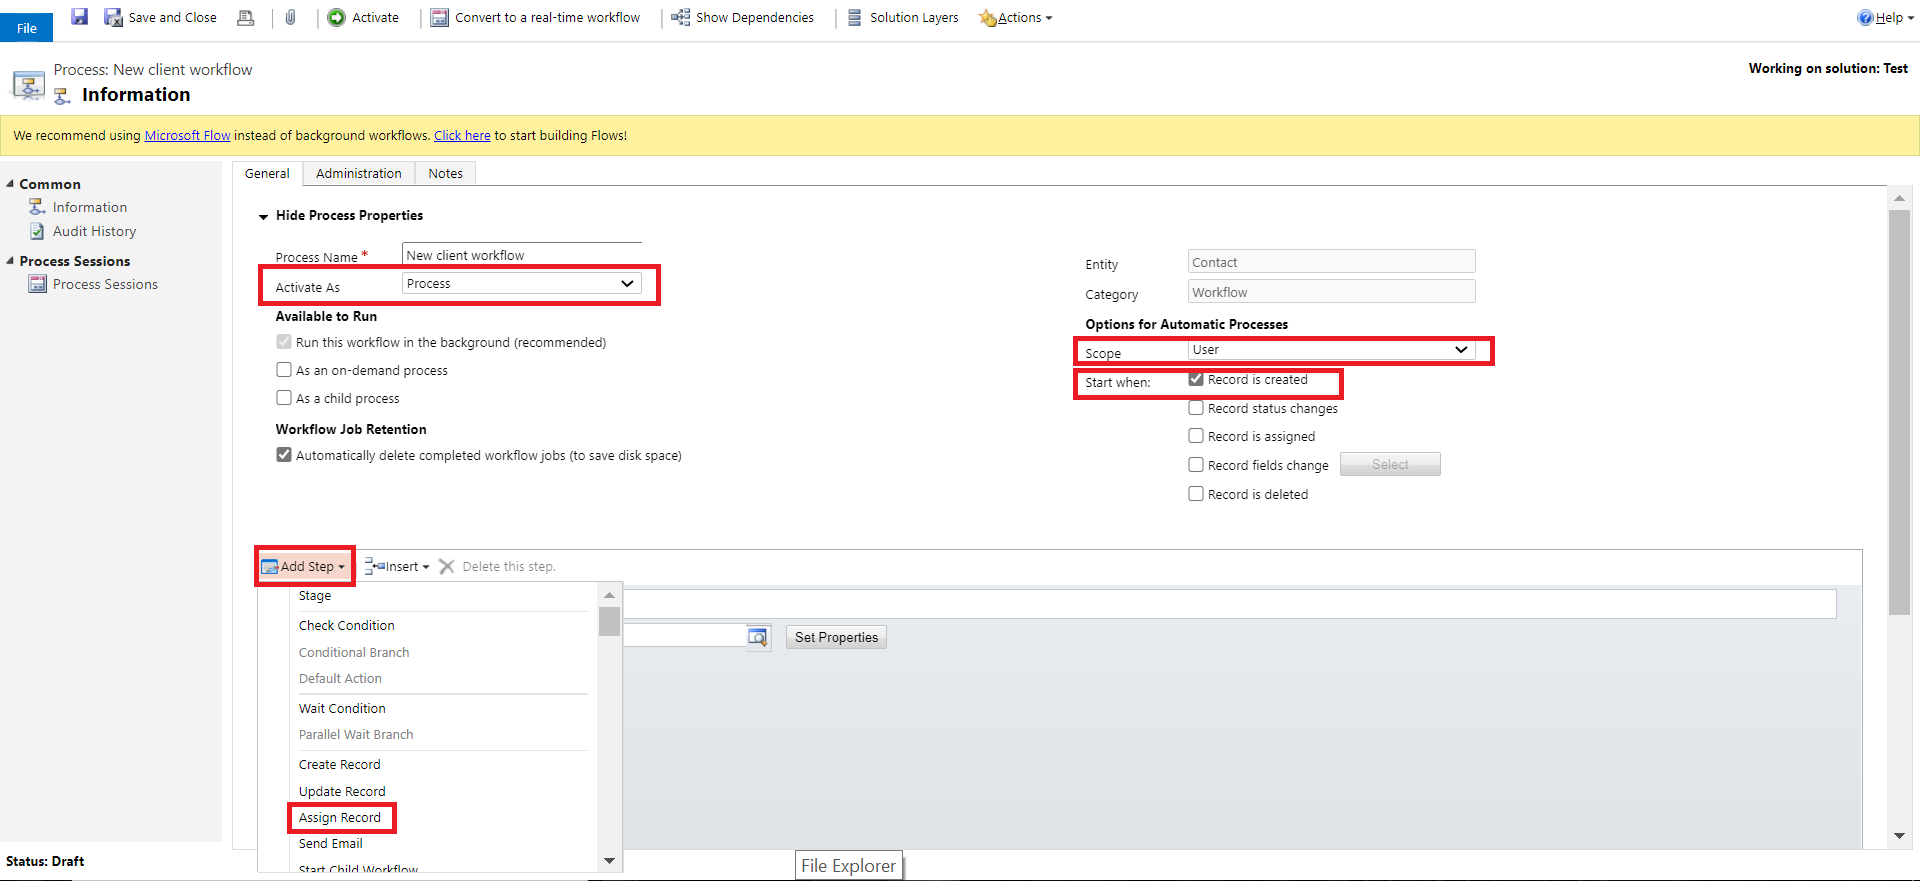
Step 4 - In the New Process window, enter the following details.
Activate As - Process
Scope − User
Start When - Record is Created.
Click Add Step → Assign Record
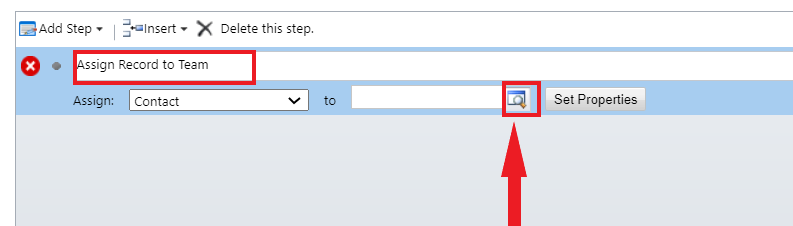
Step 5 - You'll see a brand new step other to the workflow. During this step, we'll specify the user to whom all the created contacts ought to be appointed. Enter the name under of step as Assign Record to Team. The Assign possibility are going to be defaulted because the entity on Which we are Creating the workflow (Contact in our case). Click the search icon.
Step 6 - within the search window, choose any user that you need or a particular team to whom you would like to assign the records to. Click Add.
.png?ver=2020-08-06-005502-730)
Step 7 - Add other step by clicking Add Step → Send Email. During this step, we will configure sending email to the client.
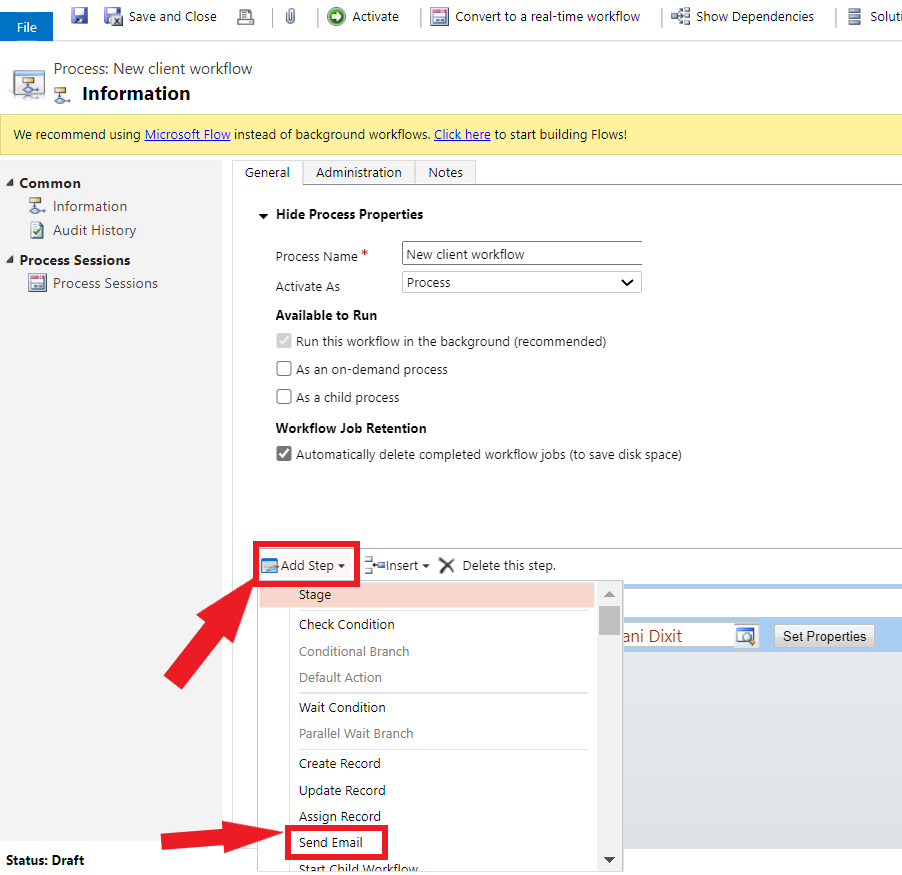
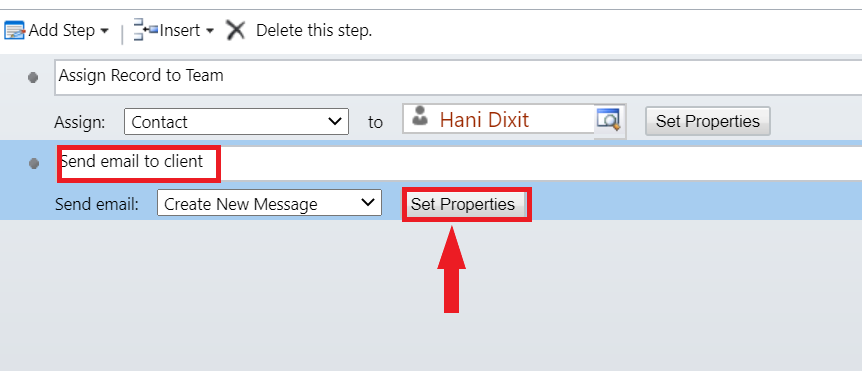
Step 8 − A new step are added. Enter its name as Send email to the client. Click Set Properties.
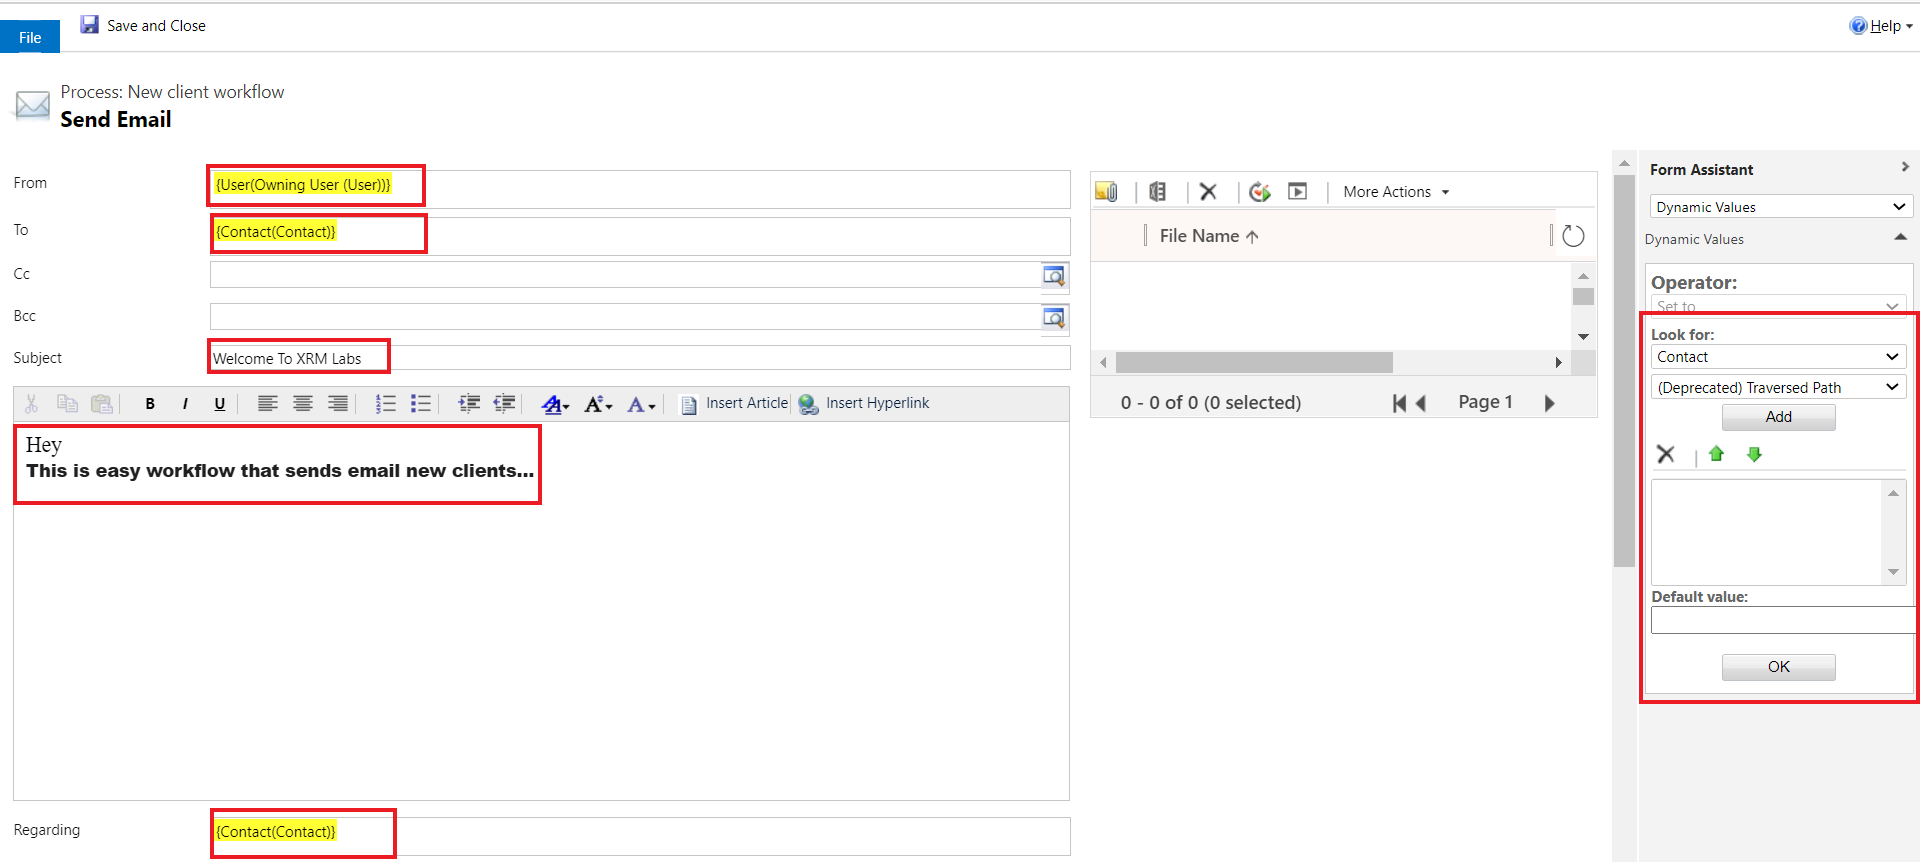
Step 9 - within the next window to configure email, perform the following operations
From − Click From field. On the correct panel, choose Owning User and User. Click add then OK.
To − Click To field. On the correct panel, choose Contact from Look For dropdown and click add then press OK.
Subject − Enter a relevant Subject.
Body − Enter a relevant Body content.
Step 10 − Click Save and then Activate.
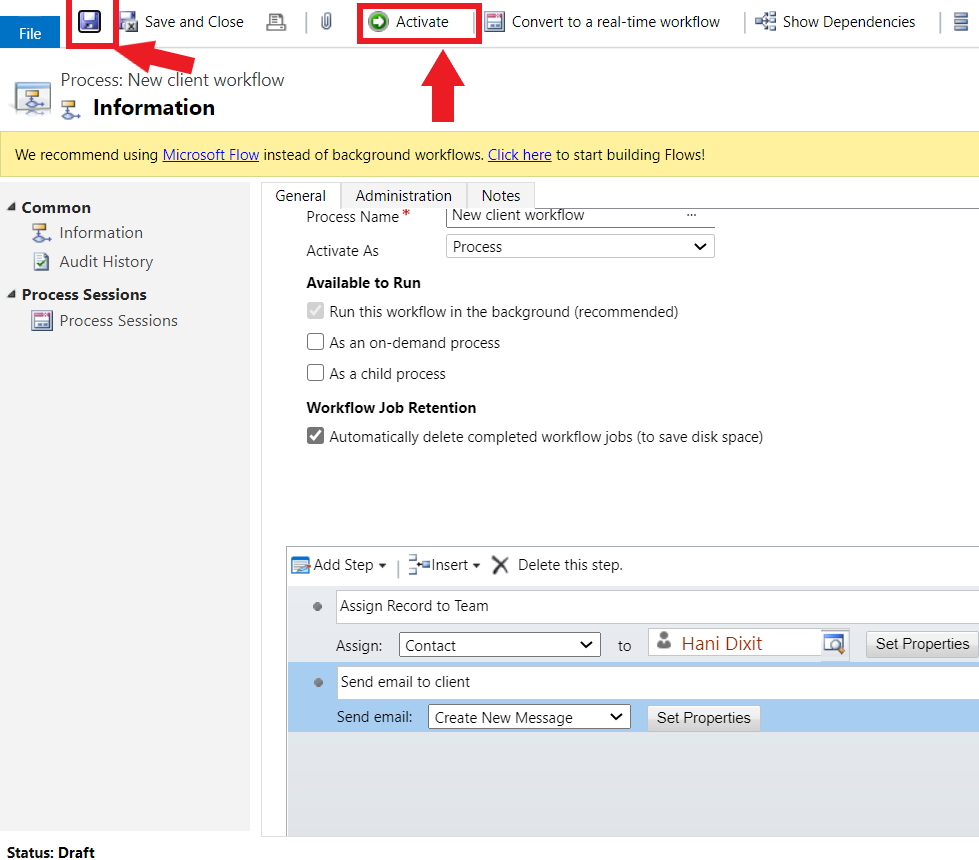
Step 11 − In the method Activate Confirmation popup that follows, click Activate.
.png?ver=2020-08-06-010045-907)
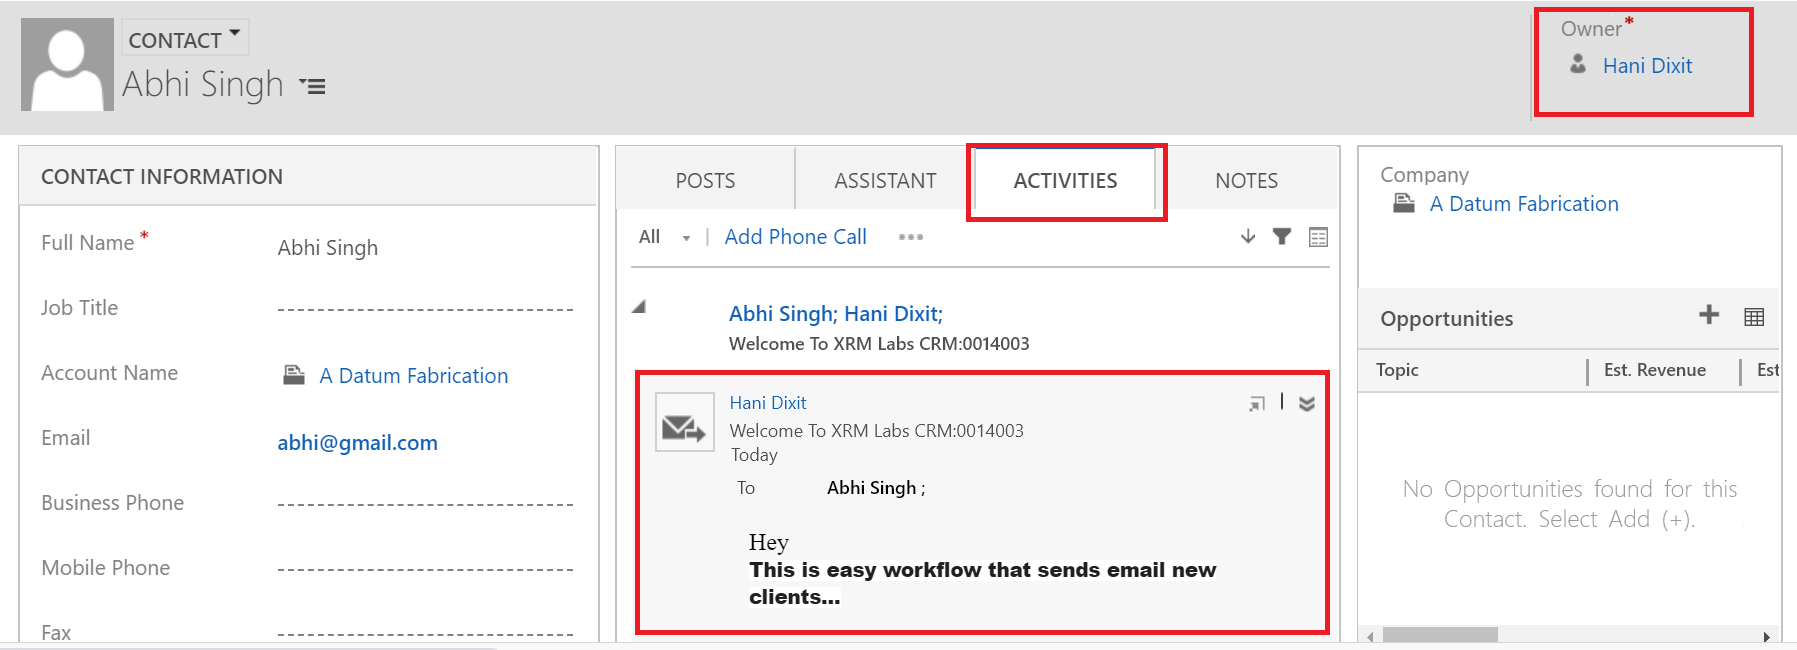
Step 12 − Go to the Contacts tab and make a replacement contact. As presently as you produce a replacement contact by saving the record, you will see the Owner field set to the user, that you simply had designed within the advancement. Also, if you click the Activities tab, you will see associate email activity being created for this contact. This confirms that the advancement ran successfully.