After registering the app in Azure AD (Search: Registering an App in Azure AD for Dynamics 365 API Access), the next step is to fetch available environments from Dynamics 365 using the Web API. This helps identify which environments are accessible for automation.
Prerequisites
✔ Azure AD app registered
✔ API permissions granted for Dynamics CRM
✔ Client ID and Client Secret saved
Steps to Fetch Environments from Dynamics 365
Step 1: Get an Access Token
To interact with the API, we first need to authenticate using the OAuth 2.0 flow.
Request Token via Postman or Code
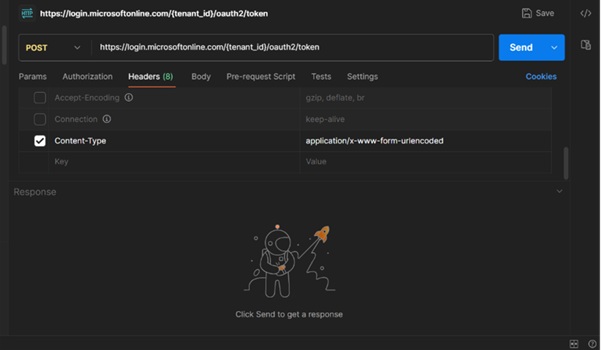
Send a POST request to the token endpoint:
URL:
https://login.microsoftonline.com/{tenant_id}/oauth2/token
Headers:
Content-Type: application/x-www-form-urlencoded
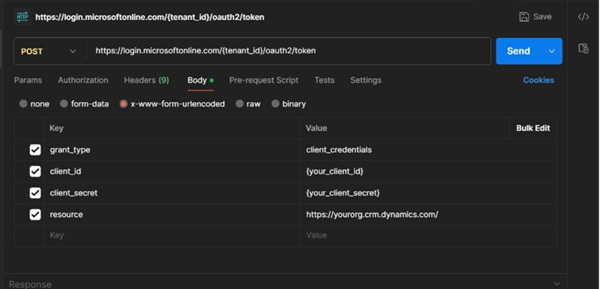
Body (x-www-form-urlencoded):
grant_type=client_credentials
client_id={your_client_id}
client_secret={your_client_secret}
resource=https://yourorg.crm.dynamics.com/
Response Example:
{
"token_type": "Bearer",
"expires_in": "3599",
"access_token": "eyJ0eXAiOiJKV..."
}
Step 2: Fetch Environments using Web API
Once you have the access token, make a GET request to retrieve the environments.
Request:
GET https://api.powerplatform.com/providers/Microsoft.BusinessAppPlatform/environments?api-version=2020-10-01
Headers:
Authorization: Bearer {access_token}
Content-Type: application/json
Step 3: Review API Response
A successful response will return details of all environments:
{
"value": [
{
"id": "12345",
"name": "Default",
"location": "North America",
"state": "Ready"
},
{
"id": "67890",
"name": "Sandbox",
"location": "Europe",
"state": "Ready"
}
]
}
Step 4: Display Data in Your Application
You can now parse this data in your application to let users choose an environment dynamically.
Conclusion
Now you have a list of available environments, which can be used for automation or further API requests. In the next blog, we’ll focus on fetching areas from model-driven apps. Stay tuned!