Microsoft Dynamics 365 allows for extensive customization, including the addition of custom buttons to the command bar. In this tutorial, we will walk through the process of inserting a custom button onto the main form of the Accounts entity. We'll use Power FX in the formula bar to demonstrate a simple operation.
Before We start make sure you have a Model-driven app created with the required Entities added. Let's get started!
Step 1: Navigate to your app
Step 2: Click on the Ellipses [ ⋯ ]symbol and click on “Open in App Designer”
You will Land on the Power Apps portal.
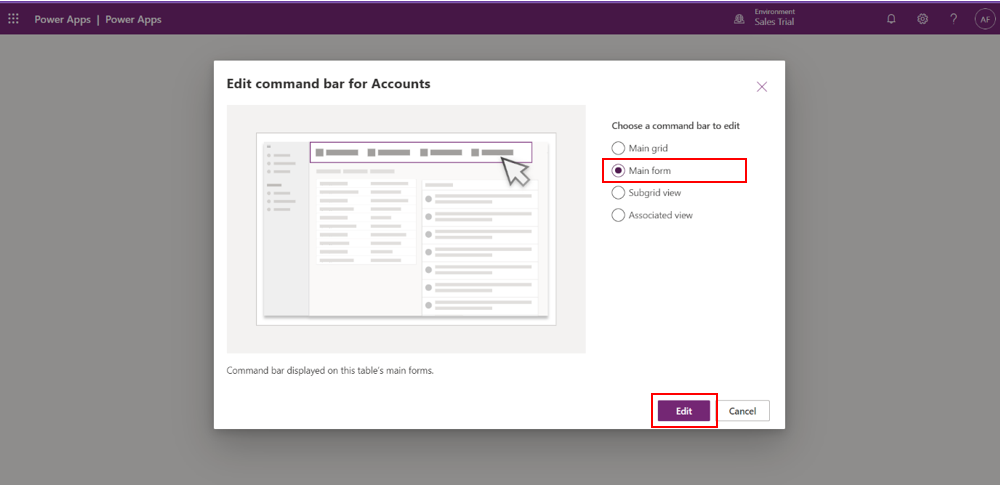
Step 4: On the Left Panel under the Navigation section, click on the Ellipses [⋯] symbol of Accounts view--Edit Command Bar--Edit.
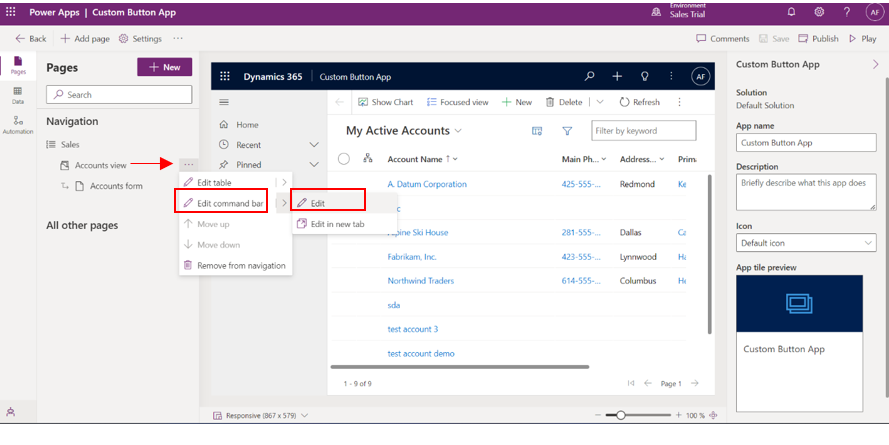
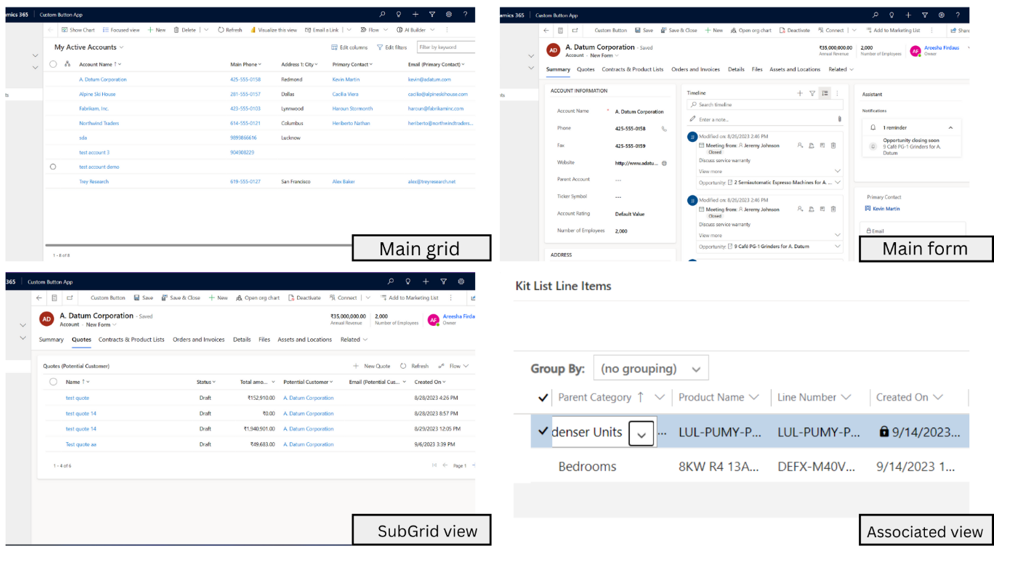
Step 5: Choose the Command Bar to Edit. You will see the following options.
1. Main Grid: Primary record list view.
2. Main Form: Primary record detail view.
3. SubGrid View: Related records display.
4. Associated View: Related data overview.
Here, we want to add a button to the Main form so we will choose Main Form and Click on “Edit”.
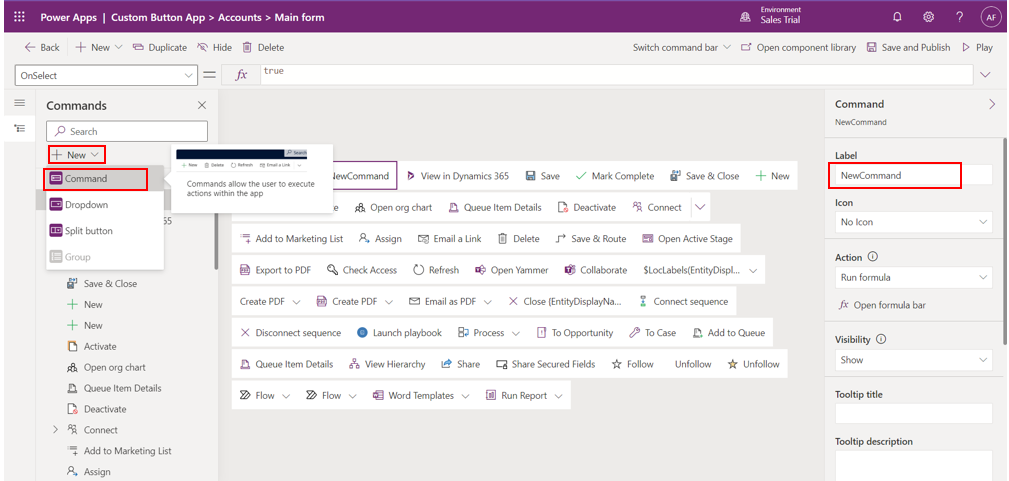
The main form Editor Window will open
Step 6: Click on “New”
Step 7: Choose the “Command” Option
Step 8: Give a Name to your Button
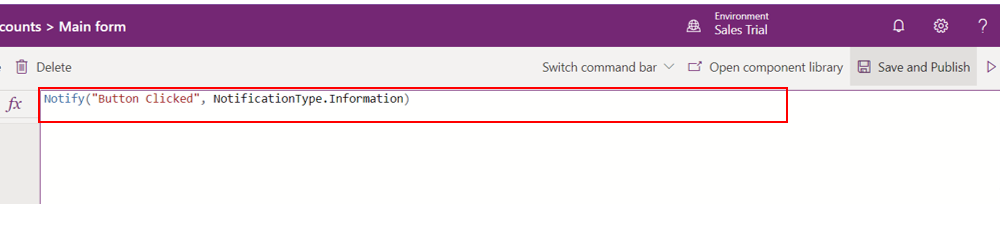
Step 9: Open the formula Bar at the Top and Write the following command:
Command: Notify ("Button Clicked", NotificationType.Information)
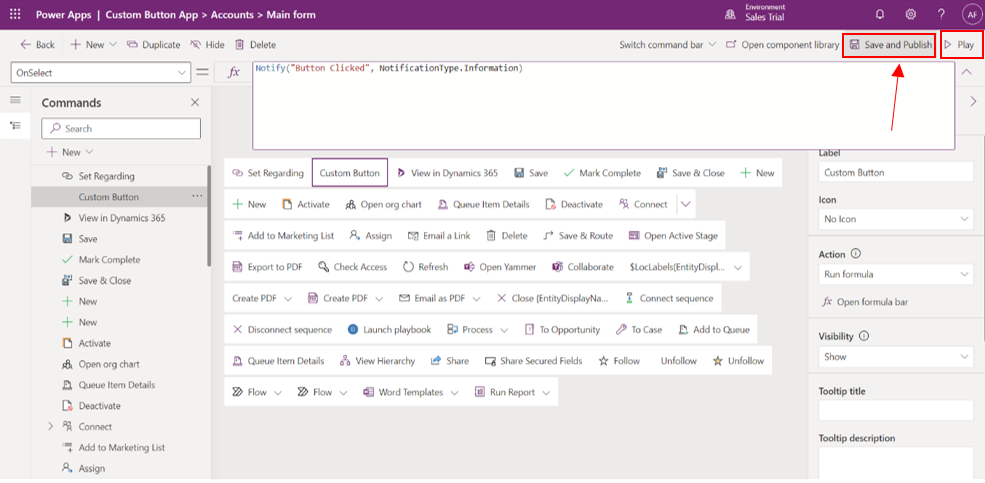
Step 10 Click on “Save and Publish” and then click on “Play”
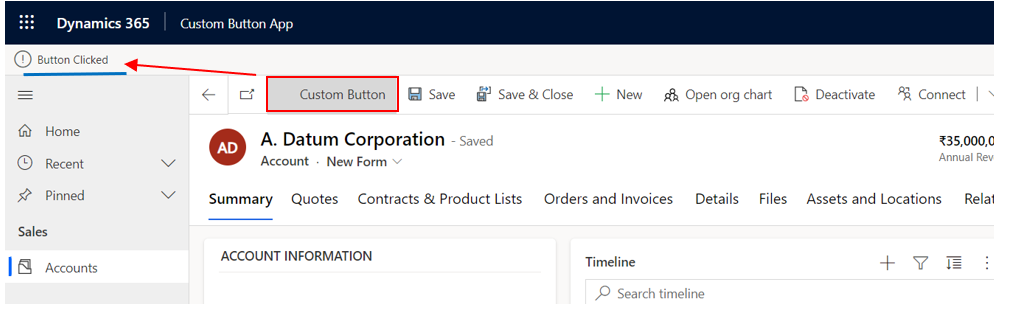
Open Your Dynamics 365 Page, Refresh the page and Open any Record of the targeted entity.
You will find your button on the Command Bar.
Step 11: Click on the Button
You will see a Notification Pop-up of “Button Clicked” as soon as you hit the button.